Chasing the “Finished Product” Look in Multi-Material PETG Printing

There’s a point in 3D printing where you stop asking:
“Will it print?”
…and start asking:
“How do I make this look professionally made?”
That’s where I’ve been lately.
Over the past several days I’ve been tuning multi-material PETG prints on the Snapmaker U1 while also comparing results against several of my Bambu Lab printers. My current focus has been on decorative drink koozies, bird feeders, birdhouses, and other outdoor-style products designed for flea markets and local sales.
The Goal
The original goal sounded simple enough:
• Matte PETG body
• Contrasting graphics
• Clean seams
• Minimal stringing
• Better surface finish
• A more premium overall appearance
The reality?
Multi-material PETG tuning becomes a balancing act very quickly.
You’re managing:
• Purge towers
• Tool changes
• Retraction behavior
• Cooling
• Temperatures
• Surface finish
• Seam placement
• Material compatibility
…and one weak setting can ruin an otherwise beautiful print.
The Purge Tower Failure
One of the first major problems I ran into was a purge tower failure during a long multi-material print.
Ironically, the actual koozie itself was printing beautifully:
• Smooth walls
• Excellent matte finish
• Sharp graphics
• Very clean color transitions
…but the purge tower eventually failed.
The original tower was:
• Tall
• Narrow
• Rectangular
• Printed too aggressively
Eventually the nozzle clipped the tower during movement and the entire print was lost.
That’s one of the frustrating realities of multi-material printing:
Sometimes the model itself is perfect while the support structure becomes the weak point.
Fixing the Purge Tower
After a lot of experimentation, I realized stability mattered more than minimizing filament usage.
The updated purge tower now uses:
• Wider footprint
• Larger brim
• Slower print speeds
• Reinforced wall ribs
• Fillet wall support
• Reduced bridge distance
• Denser internal structure
The result is a tower that behaves more like a structural object instead of a thin disposable column.
Sometimes the solution is not complicated.
Sometimes the answer is simply:
Make the thing stronger.
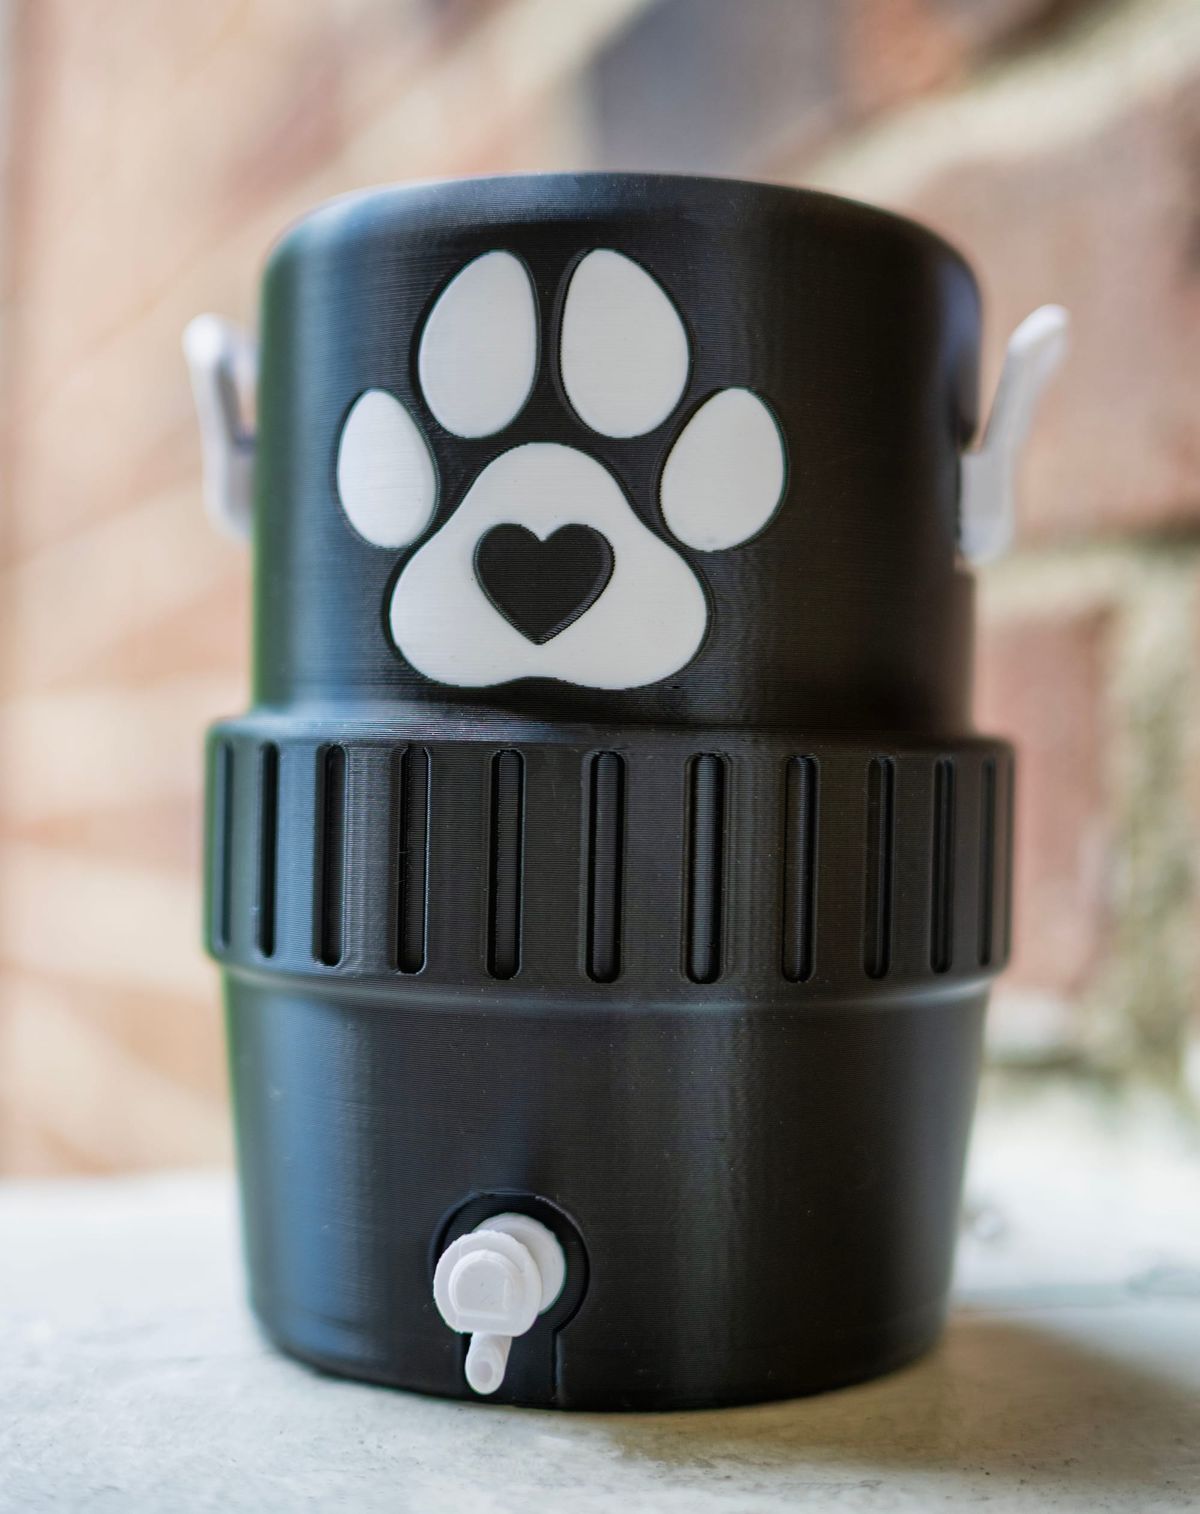
Matte PETG Changes Everything
One of the biggest surprises has been how much I’ve started preferring matte PETG for decorative prints.
Traditional PETG can sometimes look overly glossy or overly “plastic.” The matte variants soften reflections and give prints a much more refined appearance.
The overall look becomes more:
• Powder-coated
• Cast
• Manufactured
• Rustic
• Outdoor-friendly
For products like:
• Bird feeders
• Birdhouses
• Drink koozies
• Planters
• Display pieces
…it works extremely well.
I recently started experimenting with an alabaster white matte PETG that falls somewhere between cream and white. Combined with darker matte colors, it creates a much more refined look than bright high-contrast white.
The “America 250” Design
One of the newer projects involved creating a commemorative “America 250” koozie design for the upcoming 250th anniversary celebration in 2026.
The original design looked fantastic on screen:
• Distressed textures
• Small stars
• Fine vintage-style details
• Weathered graphics
The problem?
Many of those tiny details simply did not survive real-world FDM printing on a curved surface.
The smaller stars and distressed textures became inconsistent once sliced onto the koozie body.
That forced a redesign.
The updated version uses:
• Larger stars
• Cleaner shapes
• Thicker flag elements
• Bold “250” typography
• Simplified brush-style graphics
Ironically, simplifying the artwork made the final product look more professional.
That became another important lesson:
Good product design for 3D printing is not just about how something looks on a monitor.
It’s about understanding what the manufacturing process can reproduce cleanly and consistently.

Slowing Things Down
Another major improvement came from simply slowing the printer down and focusing on refinement instead of speed.
That included adjustments to:
• Outer wall speeds
• Acceleration
• Retraction tuning
• Cooling behavior
• Temperature consistency
• Seam placement
None of the improvements were dramatic individually.
Together, though, they completely changed the overall feel of the finished print.
The Real Lesson
The biggest lesson from all of this has been simple:
Refinement matters.
Not because customers inspect prints under a microscope, but because small improvements combine into a product that simply feels better in the hand.
Things like:
• Cleaner seams
• Softer finishes
• Sharper graphics
• Reduced gloss
• Better texture
• More consistent surfaces
…all contribute to a finished product that feels more intentional and more professional.
People notice the overall result even if they can’t explain exactly why.
And honestly, that’s where 3D printing becomes really rewarding:
When it stops looking like a hobby project and starts feeling like a finished product.

— Ronnie Bianco
Bianco Labs