What a Failing Hotend Taught Me About My Bambu H2D

This is what stopped one of my main printers cold.
I had a 24-hour print running — two football helmets — and everything looked fine… until it didn’t. About two-thirds of the way through, the print failed. Not a simple layer shift or adhesion issue, but something deeper.
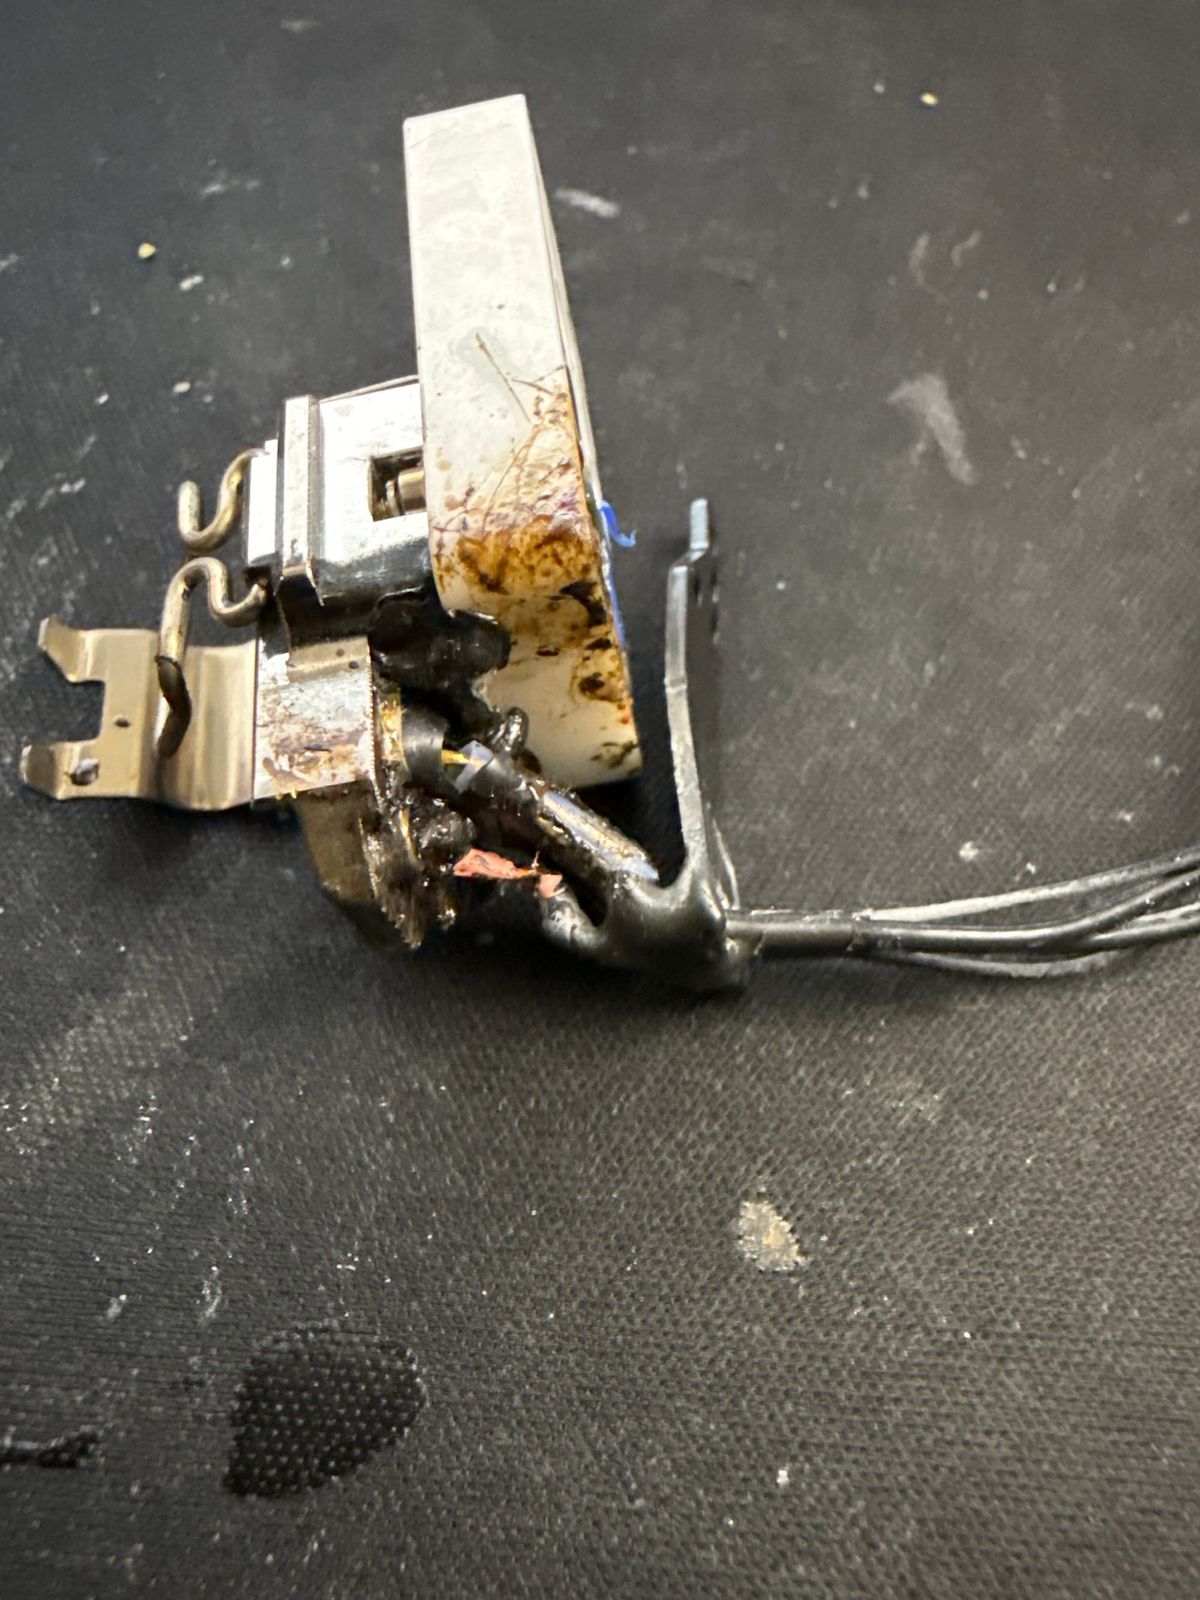
The issue turned out to be the left hotend assembly, which had been failing intermittently leading up to this print.
When a Small Problem Becomes a Big One
Looking back, the warning signs were there.
At one point during the print, I got a nozzle temperature warning. I stopped and checked everything — nothing looked wrong. No obvious damage, no visible issue. So I resumed the print.
It ran for another four hours without any problem.
And then… it didn’t.
The printer essentially decided it was done, and that was it. No recovery, no saving the job — just a hard stop.
That’s the thing with intermittent issues. They can look fine right up until they completely fail.
When it did fail, it didn’t just cost me a print. It cost me time, material, and momentum.
Working With Bambu Support
I’ll give credit where it’s due.
It took a few back-and-forth messages — probably three or four — but once they understood that the left hotend assembly was failing, Bambu stepped up and sent out a replacement.
No complaints there. They took care of it.
The Tear-Down (This Was the Real Job)
The actual replacement wasn’t the hard part.
Getting to it was.
Because of how I have my setup — with multiple AMS units stacked on top using a side-by-side bracket — I had to remove all of them just to access the printer properly.
That turned into:
- Disconnecting everything
- Clearing the top of the machine
- Opening access from both the front and the back
Only then could I actually get to the left hotend assembly and replace it.
It wasn’t a quick swap. It was a full tear-down just to reach the part that needed replacing.
The Unexpected Benefit
Here’s the part I didn’t expect.
With everything opened up, I had full access to the inside of the chamber — and it needed it.
Dust, debris, and general buildup that you don’t normally see were all there. Being able to clean it out thoroughly was probably just as valuable as replacing the hotend itself.
That kind of maintenance is easy to skip… until you’ve got the machine apart and realize how much is actually inside there.
What I Took Away From This
A few things became pretty clear:
- Small issues don’t stay small
- Intermittent problems are usually early warnings
- A warning that “looks fine” doesn’t mean it is
- Access matters — how you set up your machine affects how easy it is to maintain
- And sometimes, being forced to tear things down ends up improving more than just the original problem
Verifying the Fix
After replacing the left hotend assembly, I didn’t want to just assume everything was good and jump straight back into long prints.
First, I ran a high-precision nozzle offset calibration to make sure both nozzles were aligned correctly.
Once that checked out, I printed a two-color Benchy to verify that both hotends were working properly together. That print came out clean.
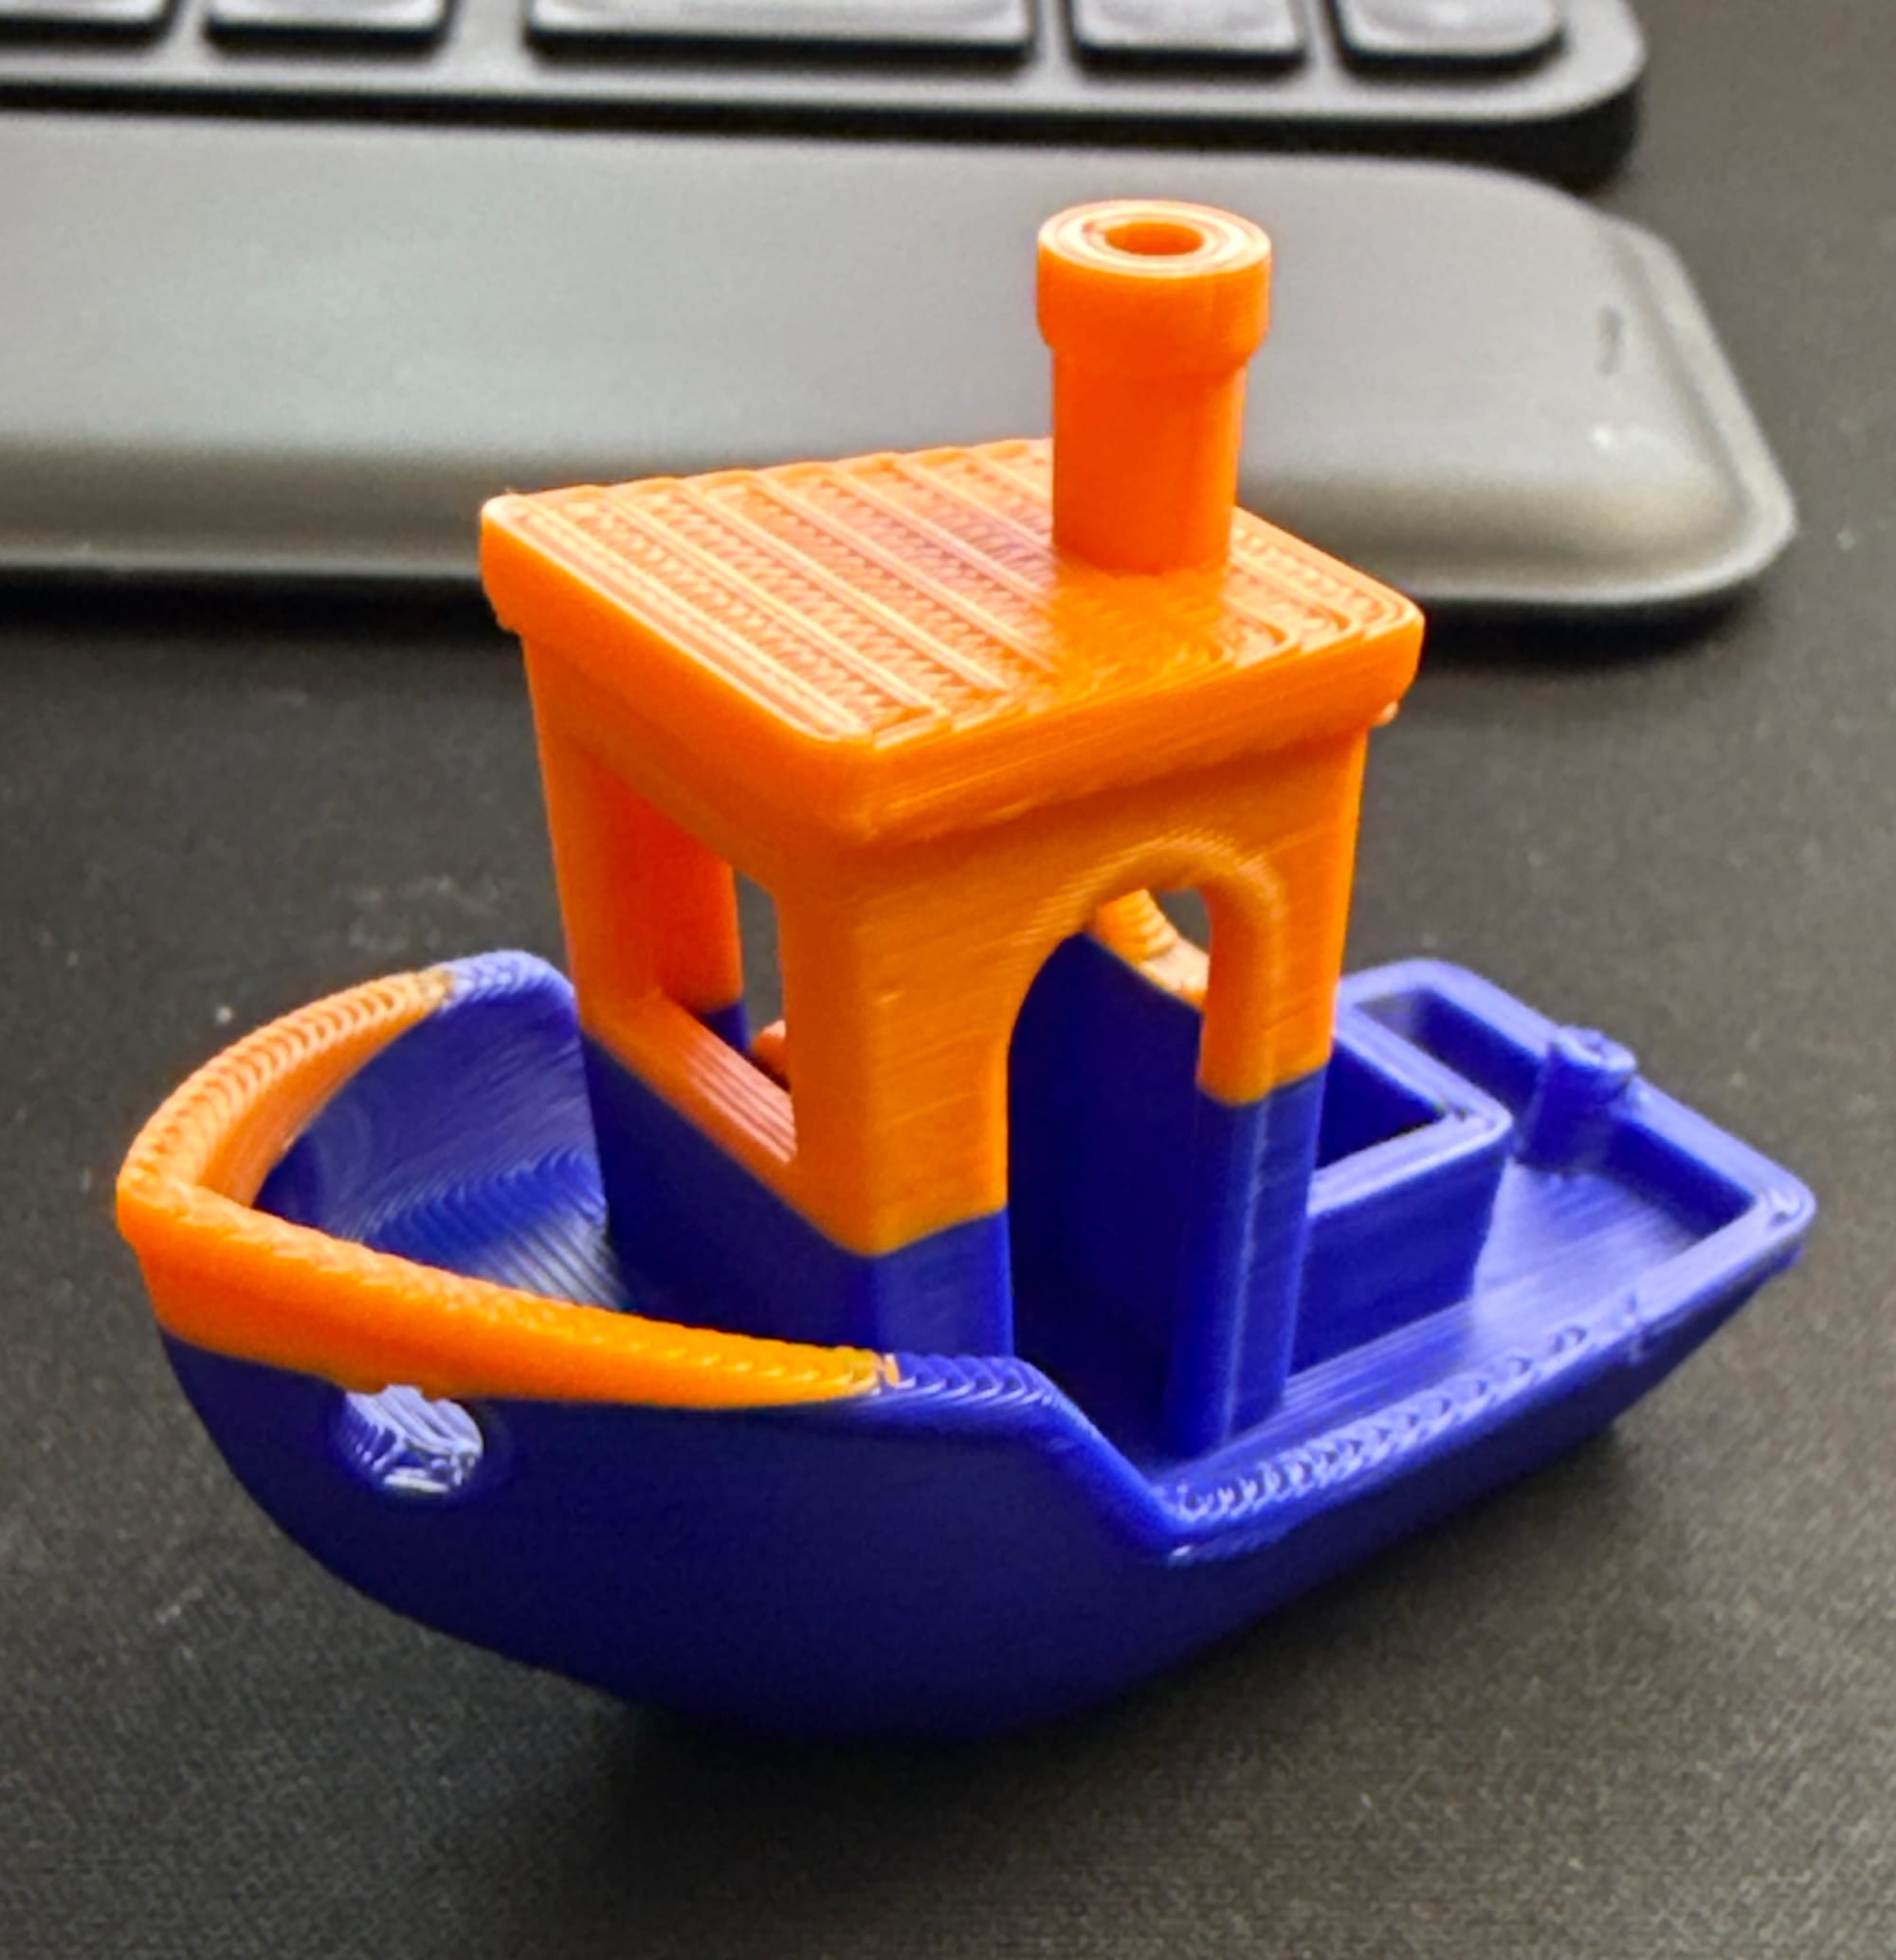
Two-color Benchy test print from Bambu H2D after replacing left hotend assembly
From there, I pushed it a little further and ran a two-color articulated print, which also completed without any issues.
At that point, I felt confident the problem was resolved and the printer was back where it needed to be.
Final Thoughts
The printer’s back up and running now — and more importantly, it’s been tested under real conditions, not just assumed to be fixed.
Between replacing the left hotend assembly, recalibrating, and running multi-color test prints, everything is behaving the way it should.
I didn’t plan on doing a full teardown and rebuild this week — but that’s how this kind of work goes.
You deal with what breaks, fix what you can, and make sure it’s actually ready before putting it back into production.